Problem
One cannot run multiple containers that use the same port, on the same host. This problem has bothered me ever since I started using docker (way back when it was version 0.7). This is a big issue for me since most of the projects I work on are web applications which all want to use port 80/443 by default, and I can't expect my users to remember to manually specify random port numbers at the end of the URL.
Updated Solution
Go here to get a more up-to-date and better solution than the one outlined in this post.
Solution
We are going to provide each container with their own public IP address on the same subnet as the host.
Steps
Create a Bridge
Bridges are like routers, except that they redirect packets based on the MAC address rather than the IP address. This is great because it means we are not going to have to create forwarding rules in iptables for each IP of the docker containers.
editor /etc/network/interfaces
Make it look something like below.
auto eth0
iface eth0 inet static

# bridge for the docker containers network to connect to main
auto wan
iface wan inet static
        address [HOST IP HERE]
        netmask [NETMASK HERE e.g. 255.255.255.0]
        gateway [GATEWAY IP e.g. 192.168.1.1 or 192.168.1.254]
        dns-nameservers [nameserver IPs e.g. 8.8.8.8 8.8.4.4]
        bridge_ports eth0
        bridge_stp off
        bridge_fd 0
        bridge_maxwait 0
Create Docker Start Script
Normally when you deploy a container, it is something like below which can be easily typed into the terminal:
docker run -d -p 80:80 [my-image]However, you will need to use the following configuration, so I suggest you create a script that you can call later.
docker run \
--net="none" \ \
--lxc-conf="lxc.network.type = veth" \
--lxc-conf="lxc.network.ipv4 = [docker container ip]/[cidr]" \
--lxc-conf="lxc.network.ipv4.gateway = [gateway ip]" \
--lxc-conf="lxc.network.link = wan" \
--lxc-conf="lxc.network.name = eth0" \
--lxc-conf="lxc.network.flags = up" \
-d [Docker Image ID]
docker run \
--net="none" \ \
--lxc-conf="lxc.network.type = veth" \
--lxc-conf="lxc.network.ipv4 = 192.168.1.25/24" \
--lxc-conf="lxc.network.ipv4.gateway = 192.168.1.1" \
--lxc-conf="lxc.network.link = wan" \
--lxc-conf="lxc.network.name = eth123" \
--lxc-conf="lxc.network.flags = up" \
-d `docker images -q | sed -n 1p`
You no longer need to worry about specifying ports, however you are going to have to keep track of your IP's which is easily done by creating a single deployment script per container that you want to run.
Virtualbox Debugging Note
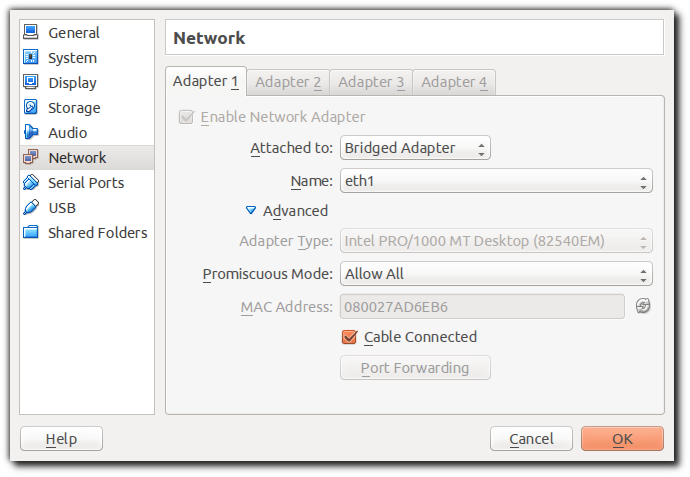
If you are testing this using a host within Virtualbox and you find out that your containers do not have internet access, please make sure that you have set up your network for the VM as follows (see the Promiscuous Mode setting):

No comments:
Post a Comment